 0
komentar
0
komentar
8 Registry Hacks to Tweak Your Windows PC
 Microsoft Windows offers a feature-rich interface and several customization options that make it one of the most user friendly operating systems in the world. However, computer geeks would still love to hack the Windows Registry so as to add more extra features and functionalities to their operating system.
If you’re one such geek who would like to customize Windows in your own way, here is a list of 8 interesting registry hacks that you need to try:
1. Disable USB Devices:
Disabling USB ports can be a smart idea to add security to the computer. This can be really handy if the computer is on a public place where the chances of virus and other malware infection is really high. You can easily disable access to USB ports with the following registry hack:
- Open the Registry Editor (Start -> Run -> Type regedit and hit Enter)
- In the registry, navigate to the following key:HKEY_LOCAL_MACHINE\SYSTEM\CurrentControlSet\Services\UsbStor
- In the right-side pane, double-click on “Start”.
- In the “Value data” field enter 4 and click on “OK”.
- Close the Registry Editor and reboot.
To enable USB devices, follow the same procedure as above except in the step-4 enter 3 in the “Value data” field.
Works on Windows XP, Vista and 7.
2. Disable Notification Balloons in Windows 7 and Vista:
You can now disable the annoying notification balloons that keeps popping up frequently with warning messages and reminders. Here is a step-by-step procedure to do that:
- Open the Registry Editor and navigate to the following key:HKEY_CURRENT_USER\Software\Microsoft\Windows\CurrentVersion\Explorer\Advanced
- Right-click on the right-hand pane, and create a new “DWORD”.
- Rename it to EnableBalloonTips, double-click on it and set the “Value data” to 0. Reboot the computer to see the changes in effect.
3. Add “Recycle Bin” to My Computer in Windows 7 and Vista:
Would you like to add the “Recycle Bin” icon to My Computer so that you need not go back to the desktop to access it when required? Well, here is how you can do that:
- Open the Registry Editor and navigate to the following key:HKEY_LOCAL_MACHINE\SOFTWARE\Microsoft\Windows\CurrentVersion\Explorer\MyComputer\ NameSpace
- Right-click on “NameSpace” and select New -> Key. Name the key with the following name:{645FF040-5081-101B-9F08-00AA002F954E}
- Now, open “My Computer” and hit F5 to refresh the screen. This should show up the “Recycle Bin” icon.
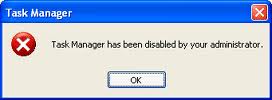
4. Disable the Windows Task Manager:
Need to limit access to your computer by disabling the Task Manager? Here is a simple registry hack to do this:
- Open the Registry Editor and navigate to the following key:HKEY_CURRENT_USER\Software\Microsoft\Windows\CurrentVersion\Policies
- Right-click on “Policies”, select New -> Key and name the key as System.If you are on Windows XP, you need not create the new key “System” as it is already present in it. So, you can directly navigate to: HKEY_CURRENT_USER\Software\Microsoft\ Windows\CurrentVersion\Policies\System in the Step-1 itself.
- Right-click on “System”, create a new “DWORD” and name it to DisableTaskMgr.
- Double-click on the DWORD “DisableTaskMgr” and set the “Value data” to 1 (0=Enable, 1=Disable).
- To enable the Task Manager, Set the “Value data” back to 0.
Works on Windows XP, Vista and 7.
5. Change the Registered Owner and Organization Name:
Here is a simple hack to change the name of the Registered owner on your computer:
- Open the Registry Editor and navigate to:HKEY_LOCAL_MACHINE\SOFTWARE\Microsoft\Windows NT\CurrentVersion
- On the right-side pane, find the keys RegisteredOwner and RegisteredOrganization. Double-click on them to change the names to whatever you want.
- To see the changes, right-click on “My Computer” and select “Properties”.
Works on Windows XP, Vista and 7.
6. Add Programs to Windows Startup:
You can now add your favorite programs to Windows Startup without the need for using the start-up folder. Here is a way to do this:
- Open the Registry Editor and navigate to the following key:HKEY_CURRENT_USER\Software\Microsoft\Windows\CurrentVersion\Run
- On the right-side pane, create a new “String Value” and rename it to the name of the program that you want to add (you can give any name, it doesn’t matter).
- Double-click on the “String Value”, in the “Value data” field add the path of the executable program that has to execute at startup.
- Reboot the computer to see the changes in effect.
Works on Windows XP, Vista and 7.
7. Add “Pin to Start Menu” Option for Folders in Windows 7 and Vista:
Ever wanted to pin a folder to the start menu to gain faster access to it? Well, it is possible to add the “Pin to Start Menu” option so that you can plug your favorite folders to Start Menu. Here is a step-by-step procedure:
- Open the Registry Editor and navigate to:HKEY_CLASSES_ROOT\Folder\shellex\ContextMenuHandlers
- Right-click on “ContextMenuHandlers” and select New -> Key. Name the key as follows:{a2a9545d-a0c2-42b4-9708-a0b2badd77c8}
- Now, whenever you want to add a folder to Start Menu, hold down the Shift key and right-click on the folder. You should see the “Pin to Start Menu” option in the context menu”.
8. Disable “Aero Shake” in Windows 7:
One of the new additions to Windows 7 is the “Aero Shake” feature using which it is possible to grab a window using it’s title bar and shake it. This will minimize all the other open windows if any. It is really a handy feature! However, if you ever wanted to disable this feature, here is a solution:
- Open the Registry Editor and navigate to the following key:HKEY_CURRENT_USER\Software\Policies\Microsoft\Windows
- Now, right-click on “Windows” key and create a new Key called Explorer.
- Right-click on the “Explorer” key and create a new “DWORD” called NoWindowMinimizingShortcuts and set it’s value to 1.
- Close the Registry Editor and reboot the computer to see the changes in effect.
I hope you enjoyed this post. Try the hacks and share your experiences.


 Windows 7 and vista allows you to create an invisible folder without any logo and name.If you have some private data and want to hide it from pirating eyes without using any external software then certainly you will benefit from this tutorial.


