Warung Bebas
Tampilkan postingan dengan label Microsoft Windows 7 Tips And Tricks. Tampilkan semua postingan

Rabu, 24 Oktober 2012

8 Registry Hacks to Tweak Your Windows PC

8 Registry Hacks to Tweak Your Windows PC


Registry Hacks to Tweak WindowsMicrosoft Windows offers a feature-rich interface and several customization options that make it one of the most user friendly operating systems in the world. However, computer geeks would still love to hack the Windows Registry so as to add more extra features and functionalities to their operating system.
If you’re one such geek who would like to customize Windows in your own way, here is a list of 8 interesting registry hacks that you need to try:

1. Disable USB Devices:

Disabling USB ports can be a smart idea to add security to the computer. This can be really handy if the computer is on a public place where the chances of virus and other malware infection is really high. You can easily disable access to USB ports with the following registry hack:
  1. Open the Registry Editor (Start -> Run -> Type regedit and hit Enter)
  2. In the registry, navigate to the following key:
    HKEY_LOCAL_MACHINE\SYSTEM\CurrentControlSet\Services\UsbStor
  3. In the right-side pane, double-click on “Start”.
  4. In the “Value data” field enter 4 and click on “OK”.
  5. Close the Registry Editor and reboot.
To enable USB devices, follow the same procedure as above except in the step-4 enter 3 in the “Value data” field.
Works on Windows XP, Vista and 7.

2. Disable Notification Balloons in Windows 7 and Vista:

You can now disable the annoying notification balloons that keeps popping up frequently with warning messages and reminders. Here is a step-by-step procedure to do that:
  1. Open the Registry Editor and navigate to the following key:
    HKEY_CURRENT_USER\Software\Microsoft\Windows\CurrentVersion\Explorer\Advanced
  2. Right-click on the right-hand pane, and create a new “DWORD”.
  3. Rename it to EnableBalloonTips, double-click on it and set the “Value data” to 0. Reboot the computer to see the changes in effect.

3. Add “Recycle Bin” to My Computer in Windows 7 and Vista:

Would you like to add the “Recycle Bin” icon to My Computer so that you need not go back to the desktop to access it when required? Well, here is how you can do that:
  1. Open the Registry Editor and navigate to the following key:
    HKEY_LOCAL_MACHINE\SOFTWARE\Microsoft\Windows\CurrentVersion\Explorer\MyComputer\ NameSpace
  2. Right-click on “NameSpace” and select New -> Key. Name the key with the following name:
    {645FF040-5081-101B-9F08-00AA002F954E}
  3. Now, open “My Computer” and hit F5 to refresh the screen. This should show up the “Recycle Bin” icon.

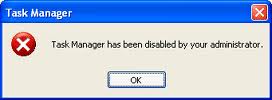
4. Disable the Windows Task Manager:

Need to limit access to your computer by disabling the Task Manager? Here is a simple registry hack to do this:
  1. Open the Registry Editor and navigate to the following key:
    HKEY_CURRENT_USER\Software\Microsoft\Windows\CurrentVersion\Policies
  2. Right-click on “Policies”, select New -> Key and name the key as System.
    If you are on Windows XP, you need not create the new key “System” as it is already present in it. So, you can directly navigate to: HKEY_CURRENT_USER\Software\Microsoft\ Windows\CurrentVersion\Policies\System in the Step-1 itself.
  3. Right-click on “System”, create a new “DWORD” and name it to DisableTaskMgr.
  4. Double-click on the DWORD “DisableTaskMgr” and set the “Value data” to 1 (0=Enable, 1=Disable).
  5. To enable the Task Manager, Set the “Value data” back to 0.
Works on Windows XP, Vista and 7.

5. Change the Registered Owner and Organization Name:

Here is a simple hack to change the name of the Registered owner on your computer:
  1. Open the Registry Editor and navigate to:
    HKEY_LOCAL_MACHINE\SOFTWARE\Microsoft\Windows NT\CurrentVersion
  2. On the right-side pane, find the keys RegisteredOwner and RegisteredOrganization. Double-click on them to change the names to whatever you want.
  3. To see the changes, right-click on “My Computer” and select “Properties”.
Works on Windows XP, Vista and 7.

6. Add Programs to Windows Startup:

You can now add your favorite programs to Windows Startup without the need for using the start-up folder. Here is a way to do this:
  1. Open the Registry Editor and navigate to the following key:
    HKEY_CURRENT_USER\Software\Microsoft\Windows\CurrentVersion\Run
  2. On the right-side pane, create a new “String Value” and rename it to the name of the program that you want to add (you can give any name, it doesn’t matter).
  3. Double-click on the “String Value”, in the “Value data” field add the path of the executable program that has to execute at startup.
  4. Reboot the computer to see the changes in effect.
Works on Windows XP, Vista and 7.

7. Add “Pin to Start Menu” Option for Folders in Windows 7 and Vista:

Ever wanted to pin a folder to the start menu to gain faster access to it? Well, it is possible to add the “Pin to Start Menu” option so that you can plug your favorite folders to Start Menu. Here is a step-by-step procedure:
  1. Open the Registry Editor and navigate to:
    HKEY_CLASSES_ROOT\Folder\shellex\ContextMenuHandlers
  2. Right-click on “ContextMenuHandlers” and select New -> Key. Name the key as follows:
    {a2a9545d-a0c2-42b4-9708-a0b2badd77c8}
  3. Now, whenever you want to add a folder to Start Menu, hold down the Shift key and right-click on the folder. You should see the “Pin to Start Menu” option in the context menu”.

8. Disable “Aero Shake” in Windows 7:

One of the new additions to Windows 7 is the “Aero Shake” feature using which it is possible to grab a window using it’s title bar and shake it. This will minimize all the other open windows if any. It is really a handy feature! However, if you ever wanted to disable this feature, here is a solution:
  1. Open the Registry Editor and navigate to the following key:
    HKEY_CURRENT_USER\Software\Policies\Microsoft\Windows
  2. Now, right-click on “Windows” key and create a new Key called Explorer.
  3. Right-click on the “Explorer” key and create a new “DWORD” called NoWindowMinimizingShortcuts and set it’s value to 1.
  4. Close the Registry Editor and reboot the computer to see the changes in effect.
I hope you enjoyed this post. Try the hacks and share your experiences.

Kamis, 11 Oktober 2012

Taking a screenshot on a Windows PC


Taking a screenshot on a Windows PC is easy. Taking a screenshot (also called a screen grab, or print screen) can be done in one of several ways. Try any of the techniques listed below.

Steps

Snipping Tool Method

The Snipping Tool method works with Windows 7 Home Premium, Professional and Ultimate, and with Windows Vista editions except Starter and Home Basic. For other versions of Windows, use the Print Screen method described below. For a more detailed tutorial on using the Snipping tool, see How to Take a Screenshot with the Snipping Tool.
  1. 1
    Open the Snipping Tool. The Snipping Tool is found in Start/All Programs/Accessories/Snipping Tool.


    • The Snipping Tool is only found in Windows 7 Home Premium, Professional, and Ultimate, and in all Windows Vista versions except Starter and Home Basic. If you don't have the snipping tool, use the Print Screen method instead.
  2. 2
    Choose the kind of screenshot (snip) you would like to take. "Rectangular Snip" is chosen by default.


    • "Free-form Snip" lets you draw an area of any shape. Only the area you drew will be snipped.
    • "Rectangular Snip" lets you select a rectangular area, which will be snipped.
    • "Window Snip" lets you choose a window to snip.
    • "Full-screen Snip" snips the whole screen, with all windows (except the Snipping Tool window) included.
  3. 3
    Select the area that you want a screenshot of. If you chose "Window Snip", select a window instead. If you chose "Full-Screen Snip", go to the next step.


  4. 4
    Save the screenshot by clicking the floppy disk icon in the window that pops up. Type in a name for the screenshot and change the "Save as type:" field if desired. Read the "Tips" section for information on file types. You can now send the screenshot by email or put it on a website.

    Posted By: Gautham Haridas, via http://wiki-trickz.blogspot.com

Sabtu, 21 Juli 2012

Enable Task Manager disabled by Administrator or Virus in Windows

enable task manager disabled by administrator


 Registry Editor is an inbuilt Windows tool that is used to modify registry keys which tell Windows how it should work. A simple registry modification can be used to bypass the Task Manager block. To do so, just follow the 


  steps:-

  1. Click on Start. Go to Run. If you use Windows 7 or Windows Vista, go to Search.
  2. Type regedit and press Enter. Registry Editor will start. If Registry Editor is also disabled, you will first need to enable registry editing.
  3. Through the left hand navigation pane, navigate to HKEY_CURRENT_USER\Software\Microsoft\ Windows\ Current Version\Policies\System.
  4. In the work area, double click on "Disable TaskMgr". A window will pop up.
  5. Enter its value data as 0 and press OK.
  6. Close Registry Editor. If Task Manager is still disabled, restart your computer.
                                                               OR 


Create a Registry(.reg) file for enabling Task Manager

If you are unfamiliar with manually editing the Registry, you can create a Registry file which will automatically modify the Registry Key to re-enable Task Managing. To create one such file:-
  1. Open Notepad or any other text editor.
  2. Copy the code given below and paste it as it is in it.
  3. Windows Registry Editor Version 5.00 [HKEY_CURRENT_USER\Software\Microsoft\Windows\ CurrentVersion\Policies\System] “DisableTaskMgr”  =dword:00000000
  4. Save the file as Enable Task Manager.reg or *.reg.
  5. Open the file by double clicking on it.
  6. Registry Editor will ask you for confirmation. In the confirmation Window, click Yes.
  7. Task Manager would immediately be accessible. If it is not, restart your computer.


Selasa, 03 Juli 2012

General Keyboard Shortcuts

General Keyboard Shortcuts,

General Keyboard Shortcuts
 
CTRL+C (Copy) 
CTRL+X (Cut)
CTRL+V (Paste)
CTRL+Z (Undo)
DELETE (Delete)
SHIFT+DELETE (Delete the selected item permanently without placing the item in the Recycle Bin)
CTRL while dragging an item (Copy the selected item)
CTRL+SHIFT while dragging an item (Create a shortcut to the selected item)
F2 key (Rename the selected item)
CTRL+RIGHT ARROW (Move the insertion point to the beginning of the next word)
CTRL+LEFT ARROW (Move the insertion point to the beginning of the previous word)
CTRL+DOWN ARROW (Move the insertion point to the beginning of the next paragraph)
CTRL+UP ARROW (Move the insertion point to the beginning of the previous paragraph)
CTRL+SHIFT with any of the arrow keys (Highlight a block of text)
SHIFT with any of the arrow keys (Select more than one item in a window or on the desktop, or select text in a document)
CTRL+A (Select all)
F3 key (Search for a file or a folder)
ALT+ENTER (View the properties for the selected item)
ALT+F4 (Close the active item, or quit the active program)
ALT+ENTER (Display the properties of the selected object)
ALT+SPACEBAR (Open the shortcut menu for the active window)
CTRL+F4 (Close the active document in programs that enable you to have multiple documents open simultaneously)
ALT+TAB (Switch between the open items)
ALT+ESC (Cycle through items in the order that they had been opened)
F6 key (Cycle through the screen elements in a window or on the desktop)
F4 key (Display the Address bar list in My Computer or Windows Explorer)
SHIFT+F10 (Display the shortcut menu for the selected item)
ALT+SPACEBAR (Display the System menu for the active window)
CTRL+ESC (Display the Start menu)
ALT+Underlined letter in a menu name (Display the corresponding menu)
Underlined letter in a command name on an open menu (Perform the corresponding command)
F10 key (Activate the menu bar in the active program)
RIGHT ARROW (Open the next menu to the right, or open a submenu)
LEFT ARROW (Open the next menu to the left, or close a submenu)
F5 key (Update the active window)
BACKSPACE (View the folder one level up in My Computer or Windows Explorer)
ESC (Cancel the current task)
SHIFT when you insert a CD-ROM into the CD-ROM drive (Prevent the CD-ROM from automatically playing)
Dialog Box Keyboard Shortcuts
CTRL+TAB (Move forward through the tabs)
CTRL+SHIFT+TAB (Move backward through the tabs)
TAB (Move forward through the options)
SHIFT+TAB (Move backward through the options)
ALT+Underlined letter (Perform the corresponding command or select the corresponding option)
ENTER (Perform the command for the active option or button)
SPACEBAR (Select or clear the check box if the active option is a check box)
Arrow keys (Select a button if the active option is a group of option buttons)
F1 key (Display Help)
F4 key (Display the items in the active list)
BACKSPACE (Open a folder one level up if a folder is selected in the Save As or Open dialog box)
Microsoft Natural Keyboard Shortcuts
Windows Logo (Display or hide the Start menu)
Windows Logo+BREAK (Display the System Properties dialog box)
Windows Logo+D (Display the desktop)
Windows Logo+M (Minimize all of the windows)
Windows Logo+SHIFT+M (Restore the minimized windows)
Windows Logo+E (Open My Computer)
Windows Logo+F (Search for a file or a folder)
CTRL+Windows Logo+F (Search for computers)
Windows Logo+F1 (Display Windows Help)
Windows Logo+ L (Lock the keyboard)
Windows Logo+R (Open the Run dialog box)
Windows Logo+U (Open Utility Manager)
Accessibility Keyboard Shortcuts
Right SHIFT for eight seconds (Switch FilterKeys either on or off)
Left ALT+left SHIFT+PRINT SCREEN (Switch High Contrast either on or off)
Left ALT+left SHIFT+NUM LOCK (Switch the MouseKeys either on or off)
SHIFT five times (Switch the StickyKeys either on or off)
NUM LOCK for five seconds (Switch the ToggleKeys either on or off)
Windows Logo +U (Open Utility Manager)
Windows Explorer Keyboard Shortcuts
END (Display the bottom of the active window)
HOME (Display the top of the active window)
NUM LOCK+Asterisk sign (*) (Display all of the subfolders that are under the selected folder)
NUM LOCK+Plus sign (+) (Display the contents of the selected folder)
NUM LOCK+Minus sign (-) (Collapse the selected folder)
LEFT ARROW (Collapse the current selection if it is expanded, or select the parent folder)
RIGHT ARROW (Display the current selection if it is collapsed, or select the first subfolder)
Shortcut Keys for Character Map
After you double-click a character on the grid of characters, you can move through the grid by using the keyboard shortcuts:
RIGHT ARROW (Move to the right or to the beginning of the next line)
LEFT ARROW (Move to the left or to the end of the previous line)
UP ARROW (Move up one row)
DOWN ARROW (Move down one row)
PAGE UP (Move up one screen at a time)
PAGE DOWN (Move down one screen at a time)
HOME (Move to the beginning of the line)
END (Move to the end of the line)
CTRL+HOME (Move to the first character)
CTRL+END (Move to the last character)
SPACEBAR (Switch between Enlarged and Normal mode when a character is selected)
Microsoft Management Console (MMC) Main Window Keyboard Shortcuts
CTRL+O (Open a saved console)
CTRL+N (Open a new console)
CTRL+S (Save the open console)
CTRL+M (Add or remove a console item)
CTRL+W (Open a new window)
F5 key (Update the content of all console windows)
ALT+SPACEBAR (Display the MMC window menu)
ALT+F4 (Close the console)
ALT+A (Display the Action menu)
ALT+V (Display the View menu)
ALT+F (Display the File menu)
ALT+O (Display the Favorites menu)
MMC Console Window Keyboard Shortcuts
CTRL+P (Print the current page or active pane)
ALT+Minus sign (-) (Display the window menu for the active console window)
SHIFT+F10 (Display the Action shortcut menu for the selected item)
F1 key (Open the Help topic, if any, for the selected item)
F5 key (Update the content of all console windows)
CTRL+F10 (Maximize the active console window)
CTRL+F5 (Restore the active console window)
ALT+ENTER (Display the Properties dialog box, if any, for the selected item)
F2 key (Rename the selected item)
CTRL+F4 (Close the active console window. When a console has only one console window, this shortcut closes the console)
Remote Desktop Connection Navigation
CTRL+ALT+END (Open the Microsoft Windows NT Security dialog box)
ALT+PAGE UP (Switch between programs from left to right)
ALT+PAGE DOWN (Switch between programs from right to left)
ALT+INSERT (Cycle through the programs in most recently used order)
ALT+HOME (Display the Start menu)
CTRL+ALT+BREAK (Switch the client computer between a window and a full screen)
ALT+DELETE (Display the Windows menu)
CTRL+ALT+Minus sign (-) (Place a snapshot of the active window in the client on the Terminal server clipboard and provide the same functionality as pressing PRINT SCREEN on a local computer.)
CTRL+ALT+Plus sign (+) (Place a snapshot of the entire client window area on the Terminal server clipboard and provide the same functionality as pressing ALT+PRINT SCREEN on a local computer.)
Microsoft Internet Explorer Navigation
CTRL+B (Open the Organize Favorites dialog box)
CTRL+E (Open the Search bar)
CTRL+F (Start the Find utility)
CTRL+H (Open the History bar)
CTRL+I (Open the Favorites bar)
CTRL+L (Open the Open dialog box)
CTRL+N (Start another instance of the browser with the same Web address)
CTRL+O (Open the Open dialog box, the same as CTRL+L)
CTRL+P (Open the Print dialog box)
CTRL+R (Update the current Web page)
CTRL+W (Close the current window)

sOMe coOL wINdoWS 7 kEyBOArD TRiCKS

sOMe coOL wINdoWS 7 kEyBOArD TRiCKS

Some Cool Windows 7 Keyboard Tricks That Will Impress anyone....

1-Make all open windows transparent to view gadgets and icons on desktop
[Windows] + [Spacebar]

2-Show or hide the desktop
[Windows] + [D]

3-Minimize all but selected window, Reverse by clicking the key combination again
[Windows] + [Home]

4-Dock selected window to the left or right half of your screen.
[Windows] + left arrow OR [Windows] + right arrow

5-Maximized and restores the selected window.
[Windows] + up arrow OR [Windows] + down arrow

6-Maximizes and restores selected window in vertical dimension only.
[Windows] + [SHIFT] + up arrow OR [Windows] + [SHIFT] + down arrow

7-Launch 3D representation of open windows and click [Tab] key again to flip through them.
[Windows] + [Tab]

THESE TRICKS WORK ACCORDING TO VERSION OF YOUR WINDOWS 7

HOW TO CHANGE WINDOWS 7 LOGON SCREEN EASILY

HOW TO CHANGE WINDOWS 7 LOGON SCREEN EASILY

Finally Microsoft has incorporated a new feature in the latest build (7057) of Windows 7 which supports the end user to change the logon screen background without using any hacks or third-party tools.
In previous version of Windows, user had to use third-parry tools like Tune-Up-Utilities to change the logon screen background easily. Windows 7 now supports customization of Windows 7 logon screen officially. Replacing the old logon screen is just another task like changing wallpaper (Desktop background). Thanks to withinwindows for finding out this excellent feature.
 
FOLLOW THE PROCEDURE BELOW TO CHANGE THE WINDOWS 7 LOGON SCREEN.
 
1. Download the registry file from below. Extract the file and double-click on the file to enable this feature (Alternative method: right-click, select Merge).
 
2. Now, head over to the following folder:
C:\Windows\System32\oobe (“C” is your Windows Seven Installation drive)
 
3. Here, create a new folder named Info. Again, create a new folder inside the Info folder and rename it as backgrounds.
 
4. Copy your favorite image file to this folder and rename it as backgroundDefault. Note that the image must be in JPG format and the size should be less than 256 KB.
 
5. You are done. Reboot your system and see the change.
The following files (sorted by width-to-height ratio) are supported in C:\Windows\System32\oobe\Info\Backgrounds folder:
* backgroundDefault.jpg
* background768×1280.jpg (0.6)
* background900×1440.jpg (0.625)
* background960×1280.jpg (0.75)
* background1024×1280.jpg (0.8)
* background1280×1024.jpg (1.25)
* background1024×768.jpg (1.33-)
* background1280×960.jpg (1.33-)
* background1600×1200.jpg (1.33-)
* background1440×900.jpg (1.6)
* background1920×1200.jpg (1.6)
* background1280×768.jpg (1.66-)
* background1360×768.jpg (1.770833-)


Jumat, 27 Januari 2012

Windows7 working Activator

Windows7 working Activator


Windows Open 7 Activator 1.0.9
Changes in 1.0.9:
---Added all new SLP keys.
---Made Product Key 
Checker more user friendly, added button to grab the currently installed Product Key. (the default key in the key checker textbox is now which ever key you have selected in the main O7A window (with the Product Key listbox), so you can easily verify the validity and see if the key is genuine on your system before installing it.)
---Cleaned up code & minor bug fixes.
---Updated help documentation.

Rabu, 25 Januari 2012

How To Uninstall Internet Explorer from Windows 7

How To Uninstall Internet Explorer from Windows 7

How To Uninstall Internet Explorer from Windows 7 Internet Explorer  comes pre-installed in windows.Most of the people have Opera ,Firefox or chrome installed in their systems and don’t use Internet Explorer anymore.You can  get rid of it from your computer  in windows 7.This will not uninstall Internet explorer completely as many applications depend upon its engine for rendering but it will remove the executable file of the browser from your computer.
This is completely safe and it won’t affect any of your installed programs.If you have any application that requires Internet explorer it will get associated with another browser (Firefox,Chrome,Opera etc )installed in your computer.

How To Uninstall Internet Explorer from Windows 7

  • Open control Panel and change its view to Large Icons and click on Programs and Features
CPView How To Uninstall Internet Explorer from Windows 7progsandfeatures How To Uninstall Internet Explorer from Windows 7
  • Now click on Turn Windows features on or off on the left side.
turnfeaturesonoroff How To Uninstall Internet Explorer from Windows 7
  • Windows Features screen will open and uncheck the Internet Explorer 8 checkbox
OK How To Uninstall Internet Explorer from Windows 7
  • A new confirmation window will open.Click on Yes to disable Internet explorer.
verify How To Uninstall Internet Explorer from Windows 7
  • Click on Ok button to save and close the Windows Features box
  • It will take some time to uninstall it from computer.
wait How To Uninstall Internet Explorer from Windows 7
  • Now restart your computer and after restart Internet explorer will no longer be available.
restart How To Uninstall Internet Explorer from Windows 7
You can also Disable other windows features like Games,Media Features etc using the above method

Trick To Create Invisble Folder Without Name In Windows 7 And Vista

Trick To Create Invisble Folder Without Name In Windows 7 And Vista


Trick To Create Invisble Folder Without Name In Windows 7 And Vista Windows 7 and vista allows you to create an invisible folder without any logo and name.If you have some private data and want to hide it from pirating eyes without using any external software then certainly you will benefit from this tutorial.
If you want to protect your data using password then you can read my post on Axcrypt:Free Encryption Software or Bitlocker Encryption utility
In this tutorial we will protect our data first placing it in an invisible folder and then hiding it so that no one can even accidentaly open that folder.So this will provide you with two level security.
How To Create A Folder Without Name In Windows 7 And Vista?

  1. Click on Start Button in taskbar
  2. Search For Character Map
  3. Open character Map and click on the blank Coloumn
    chracter Trick To Create Invisble Folder Without Name In Windows 7 And Vista
  4. Now Click on Select Button and then on Copy Button(Now you have copied a blank Space)
  5. Create a New folder and Rename it and press Ctrl+V keys from keyboard.
By this time we have created a folder without any name.Now we have to create a folder without any Logo.
invisible Trick To Create Invisble Folder Without Name In Windows 7 And Vista
How To Create An Invisible Folder  In Windows 7 And Vista?
  1. Right click on the folder that you have created without name in the previous step.
  2. Click on Properties>>Customise>>Change Icon
  3. Now will get a popup windows with various icon.Select the blank Icon
display Trick To Create Invisble Folder Without Name In Windows 7 And Vista
4. Press Ok
By this time you have created an Invisible folder with no logo and no name.
Move all of your private data in this invisible folder.
How To Hide the Invisible Folder In Windows 7 And Vista?
  1. Right Click on the Invisible Folder
  2. Select Properties and now select the Hidden Checkbox.
By this time you have your data in an invisible folder with no logo,name and which is hidden.So only you can access this folder as only you have knowledge where this invisible folder is stored.
How To Open This Hidden folder?
1.First Make Your Hidden Files,folders visible from  folders options in control panel.You can get a hint on how to do it by clicking here
2.Now go to the drive (location) of your computer where you have created the folder without name and icon.Now press Ctrl+A your folder will get highlighted.
Just open it.

Minggu, 04 Desember 2011

How To Uninstall Internet Explorer from Windows 7

How To Uninstall Internet Explorer from Windows 7


How To Uninstall Internet Explorer from Windows 7 Internet Explorer  comes pre-installed in windows.Most of the people have Opera ,Firefox or chrome installed in their systems and don’t use Internet Explorer anymore.You can  get rid of it from your computer  in windows 7.This will not uninstall Internet explorer completely as many applications depend upon its engine for rendering but it will remove the executable file of the browser from your computer.
This is completely safe and it won’t affect any of your installed programs.If you have any application that requires Internet explorer it will get associated with another browser (Firefox,Chrome,Opera etc )installed in your computer.

How To Uninstall Internet Explorer from Windows 7

  • Open control Panel and change its view to Large Icons and click on Programs and Features
CPView How To Uninstall Internet Explorer from Windows 7progsandfeatures How To Uninstall Internet Explorer from Windows 7
  • Now click on Turn Windows features on or off on the left side.
  • Windows Features screen will open and uncheck the Internet Explorer 8 checkbox
  • A new confirmation window will open.Click on Yes to disable Internet explorer.
verify How To Uninstall Internet Explorer from Windows 7
  • Click on Ok button to save and close the Windows Features box
  • It will take some time to uninstall it from computer.
wait How To Uninstall Internet Explorer from Windows 7
  • Now restart your computer and after restart Internet explorer will no longer be available.
restart How To Uninstall Internet Explorer from Windows 7
You can also Disable other windows features like Games,Media Features etc using the above method

Rabu, 23 November 2011

How To Use Windows 7 Without Activation?

Most of you might be aware of the fact that it is possible to use Windows 7 and Vista for 120 days without activation. This is actually possible using the slmgr -rearm command which will extend the grace period from 30 days to 120 days. However in this post I will show you a small trick using which it is possible to use Windows 7 without activation for approximately an year! Here is a way to do that.

1. Go to “Start Menu -> All Programs -> Accessories” . Right click on “Command Prompt” and select “Run as Administrator“. If you are not the administrator then you are prompted to enter the password, or else you can proceed to step-2.

2. Now type the following command and hit enter
slmgr -rearm
3. You will be prompted to restart the computer. Once restarted the trial period will be once again reset to 30 days. You can use the above command for up to 3 times by which you can extend the trial period to 120 days without activation.

4. Now comes the actual trick by which you can extend the trial period for another 240 days. Open Registry Editor (type regedit in “Run” and hit Enter) and navigate to the following location
HKEY_LOCAL_MACHINE\SOFTWARE\Microsoft\Windows NT\CurrentVersion\SoftwareProtectionPlatform

5. In right-side pane, change value of SkipRearm to 1.

6. Now you will be able to use the slmgr -rearm command for another 8 times so that you can skip activation process for another 240 days. So you will get 120 + 240 = 360 days of free Windows 7 usage.

120 days using “slmgr -rearm” command before registry edit +                                                                                                                                                                
240 days using “slmgr -rearm” command after registry edit
 =      360 Days
 

Hot Thread Copyright © 2012 Fast Loading -- Powered by Blogger