Warung Bebas
Tampilkan postingan dengan label windows Xp tricks. Tampilkan semua postingan

Selasa, 08 Januari 2013

Recover "Show Desktop" Icon

Recover "Show Desktop" Icon


Yesterday I have accidentally deleted ‘show desktop icons’ button on my quick launch bar. However I was able to recover the icon using the following commands.

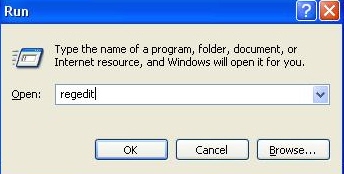
Go to Start>>Run and type the following command and press enter.
regsvr32 /n /i:U shell32.dll


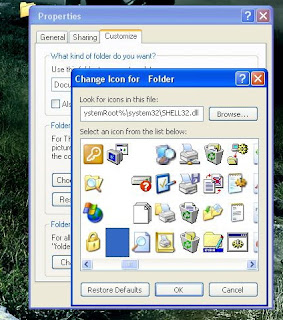
A Pop-Up should appear as below.

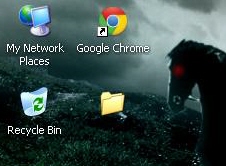
Now you can see your icon on the quick launch hidden icons as shown below which you can drag and drop on Taskbar.

Most of the cases the above trick should work. If not then you can create your own script using Notepad
.
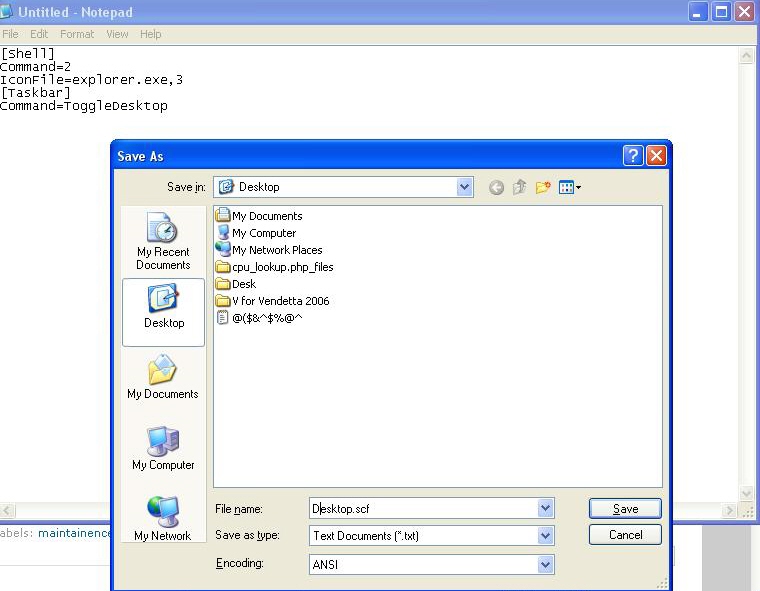
1.       Open Note Pad and paste the following.
[Shell]
Command=2
IconFile=explorer.exe,3
[Taskbar]
Command=ToggleDesktop

2.       Save the text file as ‘Desktop.scf’


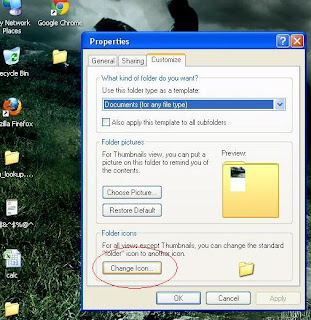
3.       You can see the missing icon at your save place, Drag the icon to quick launch bar and Done..

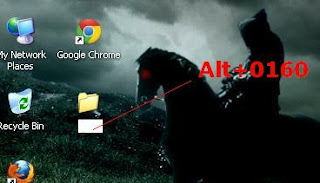
If you find any difficulty in the above process you can just remember the shortcuts.

Show Desktop -  Win+D 

Delete Recycle Bin Icon in Windows XP

Delete Recycle Bin in XP


Have you ever tried to freak out your friends! Well here is a trick that makes your buddy to go wild.

Recycle Bin is one of the most common used icon on pc, why I’m mentioning this only because other icons like My Computer, My Documents can be deleted and restored. But you can’t do neither to Recycle Bin in XP.

However you can delete it using ‘regestry’ just follow the following steps.

·         Open Run>>Type ‘regedit’ and Exter

·         Navigate through the following (Taking Registry Back Up is compulsory)
HKEY_LOCAL_MACHINE\SOFTWARE\Microsoft\Windows\CurrentVersion\Explorer\Desktop\NameSpace\Delete {645FF040-5081-101B-9F08-00AA002F954E

·         Close Registry and restart and you wont find your Recycles Bin.

Note:  To recover the same you can either import the registry back up or create the same key at the registry.

Disable/ Enable Recent Documents History

Disable/ Enable Recent Documents History


Recent Documents.. A big problem for me as I don’t want anyone to know which files I have seen at my work or home (Including some naughty pics). I don’t know what the purpose of this option is, but I’m sure it is a big threat to my privacy.

However I have found a solution to this problem by Disabling Recent Documents History in XP. Here how it works.

1.   Open the Registry Editor (select Start/Run, type regedit and click OK).
2.   Navigate to HKEY_CURRENT_USER\ Software\Microsoft\Windows\ CurrentVersion\Policies\Explorer..
3.    Create a new DWORD value of NoRecentDocsHistory
4.   Set the Data Value to ‘1’ to enable the restriction
5.   Click OK and close the Registry Editor and restart the pc once to take effect.
Now see the magic. Recent Document History.

Note: To Enable the Recent Document History you have to set the data value to ‘0’ .

Selasa, 03 Juli 2012

Simple Ways To Turn Off your PC

There are so many different ways to turn off your Windows XP computer, let's look at some of them:

1)The standard approach - click the Start Button with your mouse, then select the Turn Off menu and finally click the Turn Off icon on the Turn Off computer dialog.

2)Press Ctrl+Esc key or the Win key and press u two times - the fastest approach.

3)Get the Shutdown utility from Download.com- it add the shut down shortcuts for you. Else create them yourself using approach

4)Create a shutdown shortcut on your desktop. Right click on the desktop, choose New Shortcut and type shutdown -s -t 00 in the area where you are asked to specify the location of the program file. Now you can just double click this icon to turn off the computer. The best location would be your quick launch bar.

5)Press the Win key + R key to open the run window. Type shutdown -s -t 00. [s means shutdown while t means the duration after which you want to initiate the shutdown process].If some open processes or application won't let you turn off, append a -f switch to force a shut down by closing all active processes.

6)Win+M to minimize all windows and then Alt+F4 to bring the Turn Off computer dialog.

7)Open Windows Task manager (by right clicking the Windows Task bar or Alt+Ctrl+Del) and choose Shut down from the menu. Useful when the Windows are not responding.

8 )open task manager--->click on shutdown--->hold the ctrl key and click on Turn off::::::: pc will be turned off in 3 secs.. fastest method other than hard shutdown.

change the background of your folder

To change the background of your folder, just follow this step:

1. Open Notepad, then copy paste this code:

[ExtShellFolderViews]
{BE098140-A513-11D0-A3A4-00C04FD706EC}={BE098140-A513-11D0-A3A4-00C04FD706EC}
[{BE098140-A513-11D0-A3A4-00C04FD706EC}]
IconArea_Image=directory_of_the_image

2. Change or replace the directory_of_the_image
into the directory where you save the image (for your folder background). If you have it in the same folder which you want to change its background, then you can just type the name of the file.
Shown in the picture, the code then should be: IconArea_Image=background.jpg

3. Save the Notepad as: Desktop.ini

Done! Now whenever you try to open the folder specified, it won't show a plain white background.

This only works for XP. For Vista and windows 7, we need a third party software known as FOLDER BACKGROUND CHANGER(reffer my thread for this)

xp tweak to respond early

This tweak reduces the time XP waits before automatically closing any running programs when you give it the command to shutdown.
Go to Start then select Run
Type 'Regedit' and click ok
Find 'HKEY_CURRENT_USER\Control Panel\Desktop\'
Select 'WaitToKillAppTimeout'
Right click and select 'Modify'
Change the value to '1000'
Click 'OK'
Now select 'HungAppTimeout'
Right click and select 'Modify'
Change the value to '1000'
Click 'OK'
Now find 'HKEY_USERS\.DEFAULT\Control Panel\Desktop'
Select 'WaitToKillAppTimeout'
Right click and select 'Modify'
Change the value to '1000'
Click 'OK'
Now find 'HKEY_LOCAL_MACHINE\System\CurrentControlSet\Control\'
Select'WaitToKillServiceTimeout'
Right click and select 'Modify'
Change the value to '1000'
Click 'OK'

General Keyboard Shortcuts

General Keyboard Shortcuts,

General Keyboard Shortcuts
 
CTRL+C (Copy) 
CTRL+X (Cut)
CTRL+V (Paste)
CTRL+Z (Undo)
DELETE (Delete)
SHIFT+DELETE (Delete the selected item permanently without placing the item in the Recycle Bin)
CTRL while dragging an item (Copy the selected item)
CTRL+SHIFT while dragging an item (Create a shortcut to the selected item)
F2 key (Rename the selected item)
CTRL+RIGHT ARROW (Move the insertion point to the beginning of the next word)
CTRL+LEFT ARROW (Move the insertion point to the beginning of the previous word)
CTRL+DOWN ARROW (Move the insertion point to the beginning of the next paragraph)
CTRL+UP ARROW (Move the insertion point to the beginning of the previous paragraph)
CTRL+SHIFT with any of the arrow keys (Highlight a block of text)
SHIFT with any of the arrow keys (Select more than one item in a window or on the desktop, or select text in a document)
CTRL+A (Select all)
F3 key (Search for a file or a folder)
ALT+ENTER (View the properties for the selected item)
ALT+F4 (Close the active item, or quit the active program)
ALT+ENTER (Display the properties of the selected object)
ALT+SPACEBAR (Open the shortcut menu for the active window)
CTRL+F4 (Close the active document in programs that enable you to have multiple documents open simultaneously)
ALT+TAB (Switch between the open items)
ALT+ESC (Cycle through items in the order that they had been opened)
F6 key (Cycle through the screen elements in a window or on the desktop)
F4 key (Display the Address bar list in My Computer or Windows Explorer)
SHIFT+F10 (Display the shortcut menu for the selected item)
ALT+SPACEBAR (Display the System menu for the active window)
CTRL+ESC (Display the Start menu)
ALT+Underlined letter in a menu name (Display the corresponding menu)
Underlined letter in a command name on an open menu (Perform the corresponding command)
F10 key (Activate the menu bar in the active program)
RIGHT ARROW (Open the next menu to the right, or open a submenu)
LEFT ARROW (Open the next menu to the left, or close a submenu)
F5 key (Update the active window)
BACKSPACE (View the folder one level up in My Computer or Windows Explorer)
ESC (Cancel the current task)
SHIFT when you insert a CD-ROM into the CD-ROM drive (Prevent the CD-ROM from automatically playing)
Dialog Box Keyboard Shortcuts
CTRL+TAB (Move forward through the tabs)
CTRL+SHIFT+TAB (Move backward through the tabs)
TAB (Move forward through the options)
SHIFT+TAB (Move backward through the options)
ALT+Underlined letter (Perform the corresponding command or select the corresponding option)
ENTER (Perform the command for the active option or button)
SPACEBAR (Select or clear the check box if the active option is a check box)
Arrow keys (Select a button if the active option is a group of option buttons)
F1 key (Display Help)
F4 key (Display the items in the active list)
BACKSPACE (Open a folder one level up if a folder is selected in the Save As or Open dialog box)
Microsoft Natural Keyboard Shortcuts
Windows Logo (Display or hide the Start menu)
Windows Logo+BREAK (Display the System Properties dialog box)
Windows Logo+D (Display the desktop)
Windows Logo+M (Minimize all of the windows)
Windows Logo+SHIFT+M (Restore the minimized windows)
Windows Logo+E (Open My Computer)
Windows Logo+F (Search for a file or a folder)
CTRL+Windows Logo+F (Search for computers)
Windows Logo+F1 (Display Windows Help)
Windows Logo+ L (Lock the keyboard)
Windows Logo+R (Open the Run dialog box)
Windows Logo+U (Open Utility Manager)
Accessibility Keyboard Shortcuts
Right SHIFT for eight seconds (Switch FilterKeys either on or off)
Left ALT+left SHIFT+PRINT SCREEN (Switch High Contrast either on or off)
Left ALT+left SHIFT+NUM LOCK (Switch the MouseKeys either on or off)
SHIFT five times (Switch the StickyKeys either on or off)
NUM LOCK for five seconds (Switch the ToggleKeys either on or off)
Windows Logo +U (Open Utility Manager)
Windows Explorer Keyboard Shortcuts
END (Display the bottom of the active window)
HOME (Display the top of the active window)
NUM LOCK+Asterisk sign (*) (Display all of the subfolders that are under the selected folder)
NUM LOCK+Plus sign (+) (Display the contents of the selected folder)
NUM LOCK+Minus sign (-) (Collapse the selected folder)
LEFT ARROW (Collapse the current selection if it is expanded, or select the parent folder)
RIGHT ARROW (Display the current selection if it is collapsed, or select the first subfolder)
Shortcut Keys for Character Map
After you double-click a character on the grid of characters, you can move through the grid by using the keyboard shortcuts:
RIGHT ARROW (Move to the right or to the beginning of the next line)
LEFT ARROW (Move to the left or to the end of the previous line)
UP ARROW (Move up one row)
DOWN ARROW (Move down one row)
PAGE UP (Move up one screen at a time)
PAGE DOWN (Move down one screen at a time)
HOME (Move to the beginning of the line)
END (Move to the end of the line)
CTRL+HOME (Move to the first character)
CTRL+END (Move to the last character)
SPACEBAR (Switch between Enlarged and Normal mode when a character is selected)
Microsoft Management Console (MMC) Main Window Keyboard Shortcuts
CTRL+O (Open a saved console)
CTRL+N (Open a new console)
CTRL+S (Save the open console)
CTRL+M (Add or remove a console item)
CTRL+W (Open a new window)
F5 key (Update the content of all console windows)
ALT+SPACEBAR (Display the MMC window menu)
ALT+F4 (Close the console)
ALT+A (Display the Action menu)
ALT+V (Display the View menu)
ALT+F (Display the File menu)
ALT+O (Display the Favorites menu)
MMC Console Window Keyboard Shortcuts
CTRL+P (Print the current page or active pane)
ALT+Minus sign (-) (Display the window menu for the active console window)
SHIFT+F10 (Display the Action shortcut menu for the selected item)
F1 key (Open the Help topic, if any, for the selected item)
F5 key (Update the content of all console windows)
CTRL+F10 (Maximize the active console window)
CTRL+F5 (Restore the active console window)
ALT+ENTER (Display the Properties dialog box, if any, for the selected item)
F2 key (Rename the selected item)
CTRL+F4 (Close the active console window. When a console has only one console window, this shortcut closes the console)
Remote Desktop Connection Navigation
CTRL+ALT+END (Open the Microsoft Windows NT Security dialog box)
ALT+PAGE UP (Switch between programs from left to right)
ALT+PAGE DOWN (Switch between programs from right to left)
ALT+INSERT (Cycle through the programs in most recently used order)
ALT+HOME (Display the Start menu)
CTRL+ALT+BREAK (Switch the client computer between a window and a full screen)
ALT+DELETE (Display the Windows menu)
CTRL+ALT+Minus sign (-) (Place a snapshot of the active window in the client on the Terminal server clipboard and provide the same functionality as pressing PRINT SCREEN on a local computer.)
CTRL+ALT+Plus sign (+) (Place a snapshot of the entire client window area on the Terminal server clipboard and provide the same functionality as pressing ALT+PRINT SCREEN on a local computer.)
Microsoft Internet Explorer Navigation
CTRL+B (Open the Organize Favorites dialog box)
CTRL+E (Open the Search bar)
CTRL+F (Start the Find utility)
CTRL+H (Open the History bar)
CTRL+I (Open the Favorites bar)
CTRL+L (Open the Open dialog box)
CTRL+N (Start another instance of the browser with the same Web address)
CTRL+O (Open the Open dialog box, the same as CTRL+L)
CTRL+P (Open the Print dialog box)
CTRL+R (Update the current Web page)
CTRL+W (Close the current window)

Start your pc very fast

Start your pc very fast

One factor that is considered a barrier to your computer's start up time is the unnecessary programs that start automatically once you boot your PC. Some of these programs set themselves to run in the background and appear quickly when needed. Oftentimes, these programs also let you know that they are running on the background by showing an icon. You may not notice that your computer is slowing down, but as your PC runs, in reality these auto start programs use amounts of memory from your computer. So one way to increase
the speed is to remove those unnecessary programs that you are not using. By doing this, you can save memory and also reducing the CPU processes during your computer boot up, thus effectively increase the performance of your PC during boot up.

Here is how you can remove the unnecessary programs:
1. Click the Start menu, then click Run, and type in œMsconfig, then hit OK.
2. A System Configuration Utility Window will appear. Click the Start up tab.
3. The Start up tab will show you a list of the programs that are set to run once the Windows XP boot.
4. Improve your Start up speed by unchecking the checked items which you think you don't need upon Start. up. The more items checked the
slower the Start up speed.
5. Click Apply and then restart your PC to see the changes. 
Also check this startup folder for unnecessary programs, follow this instruction
 1. Click on the Start Menu.
2. Select Programs 
3. Then, right click on the startup under œPrograms.
4. Windows explorer would appear, now delete the links to unnecessary applications. That is how easy and simple it is to improve your computer's start up
speed. As we said, this is just one way to improve your PC's boot time.

Install Windows XP In Lesser Time

Install Windows XP In Lesser Time

Normally Windows XP OS installation takes around 40 minutes to complete,
but by using this trick you can now save 10-15 minutes.

Just Follow Instructions :

1. Boot through Windows XP CD.

2. When all the files are completely loaded,
choose the partition where you want to install.

3. Now Format the partition, whether it is normal or quick with NTFS.

4. Once the formatting is completed,
All the setup files required for installation are copied.
Restart your system by pressing Enter.
Now, here begins the Simple trick to save 10-15 minutes.

5. After rebooting,
you get a screen which shows 40 or more minutes to complete OS installation.

6. Now, Press 'SHIFT' and 'F10' Key - This opens command prompt or cmd.

7. Enter "Taskmgr" at the command prompt window.
This will open Task Manager.

8. Click the Process Tab,
here we find a process called - 'Setup.exe'
'Right Click' on 'Setup.exe'
Set Priority Select 'High' or 'Above Normal'.

Thats it,
Relax your self and see how the installation process completes faster.

Selasa, 26 Juni 2012

Windows Media Player Tweak

This tweak will launch WindowsMediaPlayer with the 'AboveNormal' priority setting when opening a mediafile. Having trouble watching a movie when you also have a lot of background processes going on? Here's what to do: 


1. Create a new textfile in the root of c:\, but instead of giving it the .txt extension you name it wmp_AboveNormal.bat 
2. Right-click this file and choose 'Edit', you'll see it'll open notepad. Put this line in: start /AboveNormal C:\"Program Files"\"Windows Media Player"\wmplayer.exe %1 %* 
3. Save (make sure you save it as .bat, not as .txt) and close. Now all you have to do is register your mediafiles to this batchfile. Here's how to do that: 
4. In Windows Explorer choose Tools>Folder Options >File Types 
5. Scroll down(press A) to the AVI filetype 
6. Click 'Change' and point to c:\wmp_AboveNormal.bat . Click OK and Close. Now everytime you dubbleclick an .avi WMP will open with the 'AboveNormal' -priority setting ! 


Note:- Repeat steps 4-6 to register all mediatypes you want to be opened this way.

Minggu, 24 Juni 2012

Remove shutdown button


Remove shutdown button

To remove the shutdown button from the logon screen in WinXP and 2K, use regedit and navigate to the following key: HKEY_LOCAL_MACHINE\SOFTWARE\Microsoft\Windows\CurrentVersion\policies\system change the value of the dword 'shutdownwithoutlogon' to '0'. exit regedit.

Creating 3D Window Effect


Creating 3D Window Effect

You can create a nice 3D effect for your windows
Start Regedit
Go to HKEY_CURRENT_USER \ Control Panel \ Colors
Make sure the following setting are there:
ButtonHilight=128 128 128ButtonShadow=255 255 255

Remove SHORTCUT link from the desktop folder


Remove SHORTCUT link from the desktop folder

how to remove short cut arrows on u'r desktop items
just go to >start>run>regedit>hkey_classes_root>u
find a file by name lnkfile click on that to that right
u can see a file by name is shortcut delete that and
again come to left click on pipfile u delete again is shortcut
then restart the pc u cant see the shortcut arrow

Make the folder INVISIBLE without hiding


Make the folder INVISIBLE without hiding

Make your folders invisible...:)

1)Right Click on the desktop.Make a new folder
2)Now rename the folder with a space(U have to hold ALT key and type 0160).
 
3)Now u have a folder with out a name.
 
4)Right click on the folder>properties>customize. Click on change icon
.
5)Scroll a bit, u should find some empty spaces, Click on any one of them.
 
click Ok. That's it.

now u can store your personal data without any 3rd party tools

FOLDER OPTION missing


FOLDER OPTION missing

Many of us sometimes find the folder options missing in windows explorer.

Here's the solution
Open Run and then type "gpedit.msc".
Now goto
User Configuration > Administrative templates > Windows Component > Windows Explorer.

Click on Windows Explorer you will find the 3rd option on the right side of screen
"Removes the Folder Option menu item from the Tools menu"

Just check it,

if it is not configured then change it to enable by double clicking on it and after applying again set it to not configured.


I hopes that you will find the option after restarting windows.

Way to get XP product CODE from CD


Way to get XP product CODE from CD

It really work
There is a way to get the xp product code from the cd
just explorer the cd then
open the folder I386
then open the file UNATTEND.TXT and
scroll down to the last line
and it goes to show what dumbasses microsoft are u have a product code.
Have fun u never need to search for a product code for xp again...!!!!

Better BACKGROUND for Microsoft Documentation..


Better BACKGROUND for Microsoft Documentation..

We hav white backgrond for our doc........... as default... but v can hav a blue also.... lets hav a view
1.) Open a Word Document by going to Start, All Programs, Microsoft Word.

2.) From the menu bar, click Tools.

3.) Select Options from the drop down menu.

4.) The Options dialogue box will open. Select the General tab.


5.) Now you will find a check box that says "Blue background, white text." Click to select it so that you have a tick mark on the box.

6.) Click OK to save the changes and to close the options dialogue box.


Now, go back to your Word document. See the difference?

Yes, now it has a blue background and when you type, the text will be all white. Try this for a few days and you should see a drastic change on the eye strain you've been experiencing.

Try this for yourself and feel the difference!

Hidden unknown fact in MICROSOFT WORD


Hidden unknown fact in MICROSOFT WORD

Bill Gates still doesn't know why it happens:
Try out yourself...
Open Microsoft Word and type
=rand(200,99)
and then HIT ENTER....see what happens.
it won't hurt ur system!!

Create Your Own Logon Message


Create Your Own Logon Message

1 Click start
click run
type regedit,
then click ok!

2 In The registry editor, drill down to the following key:
hklm\software\Microsoft\Windows NT\Current version\Winlogon.

3 Right click LegalNoticeCaption,
click modify,
Type: THIS IS NEXT TRICK,and then click ok!

4 Right click legalNoticeText,
click modify, and then Close your message!

5 Restart Your Computer.

6 The message will appear every time you logon!

Minggu, 10 Juni 2012

Create A Hidden User Account


Create A Hidden User Account

Create A Hidden User Account
This tweak allows an account that is normally displayed on the Welcome screen to be hidden from view. To log on using the account it's necessary to use the Log On To Windows dialog box similar to the one in Windows 2000. #[Start] [Run] [Regedit]#Registry Key:

HKEY_LOCAL_MACHINE\SOFTWARE\Microsoft\WindowsNT\CurrentVersion\Winlogon\SpecialAccounts\UserList#Modify/Create the Value Data Type(s) and Value Name(s) as detailed below.#Data Type: REG_DWORD [Dword Value] // Value Name: Type Name of Account to be Hidden#Setting for Value Data: [0 = Account is Hidden / 1 = Enabled]#Exit Registry and Reboot...

While the account is hidden on the Welcome screen, note that the account profile will be visible in C:\Documents and Settings or wherever user profiles are stored as well as in Local Users and Groups
 

Hot Thread Copyright © 2012 Fast Loading -- Powered by Blogger